DTH Configurations
General
General tab contain General, display, group and members discounts configurations.
General settings - View full image
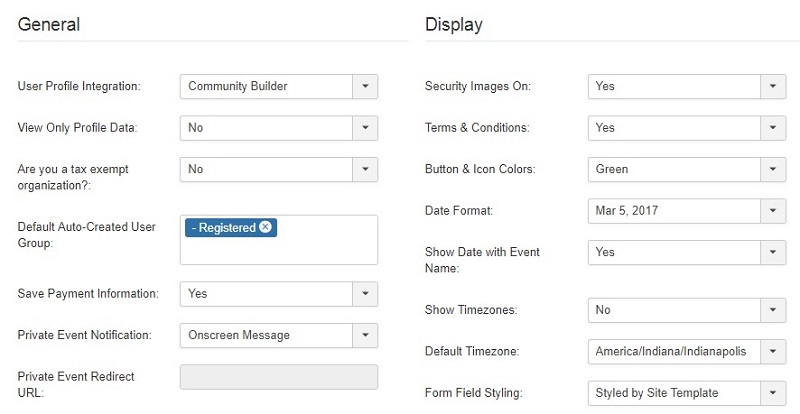
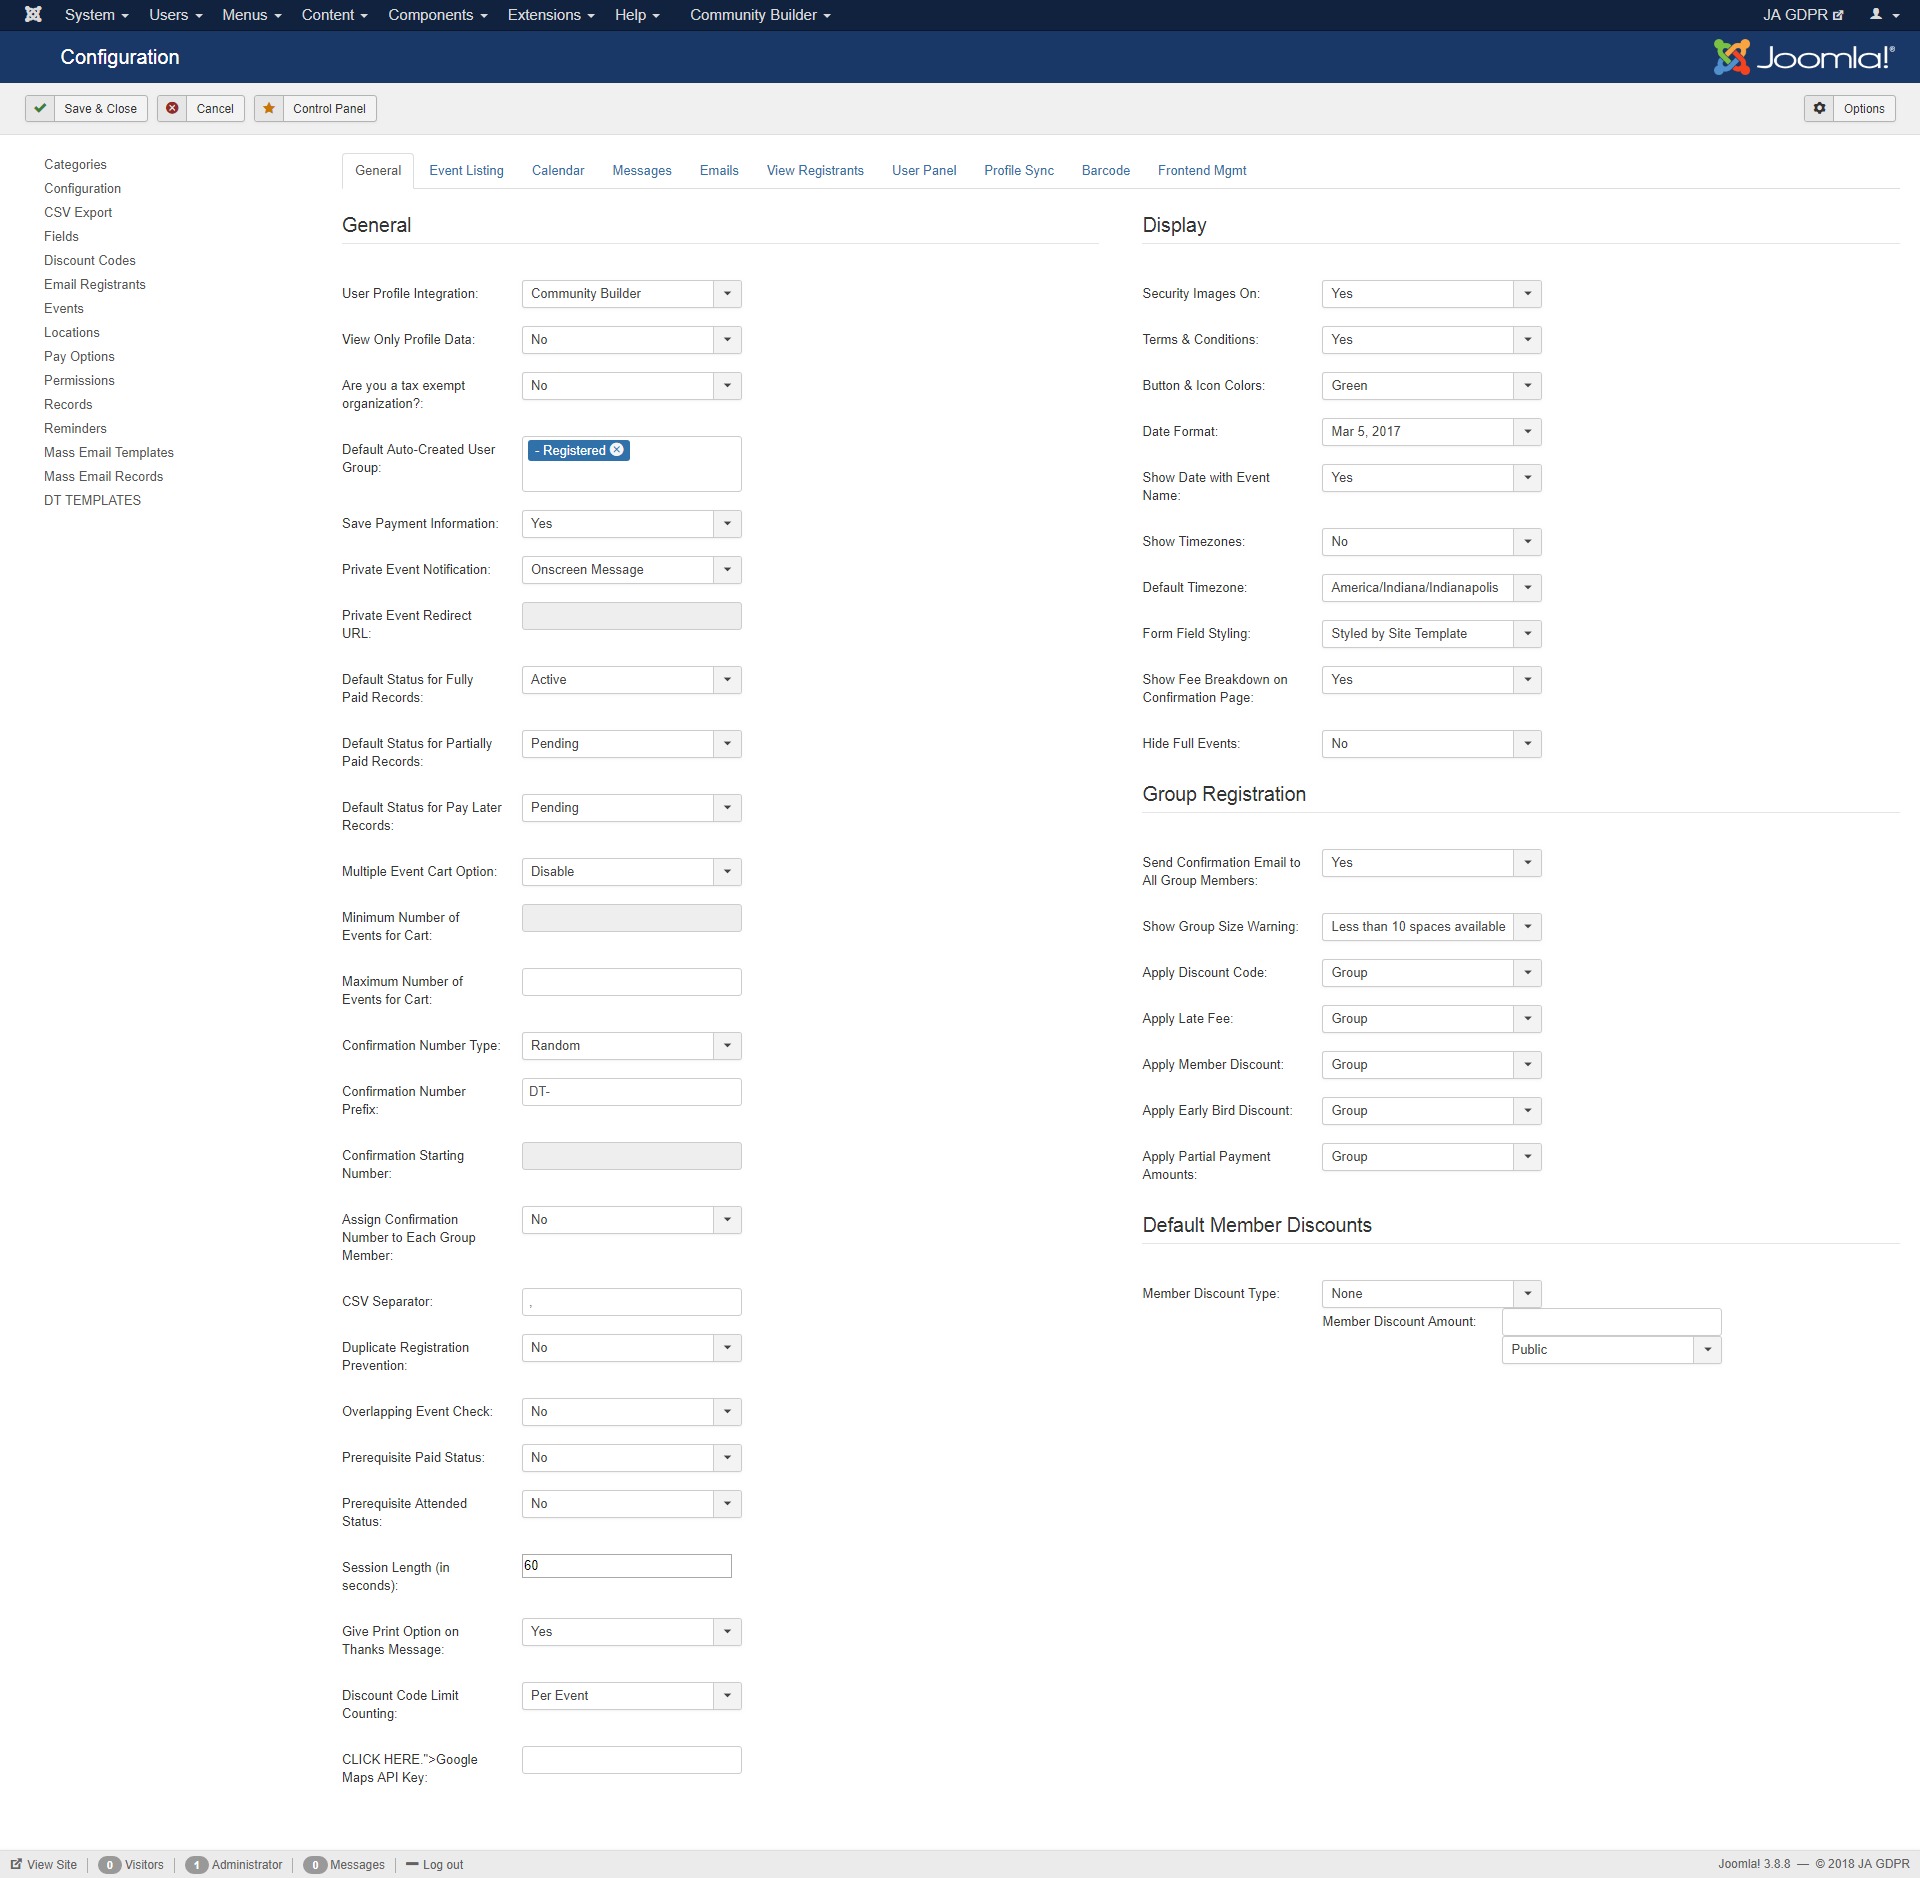
Available fields in General Settings
- User Profile Integration: Select whether or not to integrate with the Joomla user profile. Select No, or you can choose to integrate with either JomSocial or Community Builder. When integration is enabled, the registration form fields will auto-populate with data from the user profile.
- View Only Profile Data: When using CB or JomSocial Integration, select YES if you want the form fields auto-populated as view only. Then the user will be unable to modify any data coming from the profile. Select NO to populate fields but leave them editable.
- Are you a tax-exempt organization: Select Y if your organization is exempt from paying taxes for events. If you select Y you will be prompted to enter your tax exemption code.
- Default Auto-Created User Group: If you are using the auto-user creation feature for any of your events, then you need to select the Joomla user group for newly created users to be assigned
- Save Payment Information: Let the user save payment information.
- Private Event Notification: Select what you want users to see when they attempt to access an event or feature that requires the login and they are not logged in
- Private Event Redirect URL: If you have selected to use private event redirect URL, then this URL is where users will go automatically when trying to access an event or feature that requires user login. You should provide the url to your login page. Be sure to include the http:// at the beginning of the URL.
- Default Status for Fully Paid Records: Select the default status for new registration records that are fully paid at time of registration.
- Default Status for Partially Paid Records: Select the default status for new registration records that are partially paid at time of registration.
- Default Status for Pay Later Records: Select the default status for new registration records that are created using the Pay Later offline payment option.
- Multiple Event Cart Option: Select to Enable or Disable the Cart which allows you to register for multiple paid events in one transaction. When enabled, the cart view will follow after the confirmation page. Disable the cart to skip that page in registration.
- Minimum Number of Events for Cart: If using the cart feature, you can enter a number for the minimum number of events to set as required in the cart. For example, set a minimum of 3 here and the cart will not allow a user to proceed beyond the cart unless there is at least 3 events in the cart
- Maximum Number of Events for Cart: If using the cart feature, you can enter a number for the maximum number of events to set as allowed in the cart. For example, set a maximum of 3 here and the cart will not allow a user register for additional events once the maximum number is already in the cart.
- Confirmation Number Type: Each record is assigned a unique confirmation number. Select if you want that number to be randomly-generated or sequential
- Confirmation Number Prefix: If you enter a prefix here, it will be added to the beginning of the confirmation number that is generated.
- Confirmation Starting Number: If you choose a sequential confirmation number, please enter the number you want to start with.
- Assign Confirmation Number to Each Group Member: In a group registration, you can choose here if a unique confirmation number will be assigned to each member of a group, or if it will just be one number for the entire group.
- CSV Separator: Enter the character you wish to use as a separator for the CSV export utility. The default is a comma (,) but if you need something else instead, you can enter it here
- Duplicate Registration Prevention: Choose Yes/No for using the duplication registration prevention system. If you are having any issues with this, set it to NO
- Overlapping Event Check: Select YES if you want to check the date and time of an event and not allow a user to register for another event that overlaps the date/time of an event they are already registered for. Select NO if you do not want to check this. Using this feature will force all events to require user login for registration
- Prerequisite Paid Status: Select YES if you want to require that a user has Paid for the prerequisite event(s) in order to be allowed to register for the new event. Select NO if the Paid status does not matter.
- Prerequisite Attended Status: Select YES if you want to require that a user has Attended the prerequisite event(s) in order to be allowed to register for the new event. Select NO if the Attended status does not matter.
- Session Length (in seconds): This parameter affects registrations in process. A user record is in progress and holding a spot in the event until the session ends. When the registration is completed, the session is automatically ended. If the user does not complete it for one reason or another, the session will be dropped after the set amount of time. The session length value is in seconds
- Give Print Option on Thanks Message: With this option enabled, the final thanks message that a user sees after registration will have a Print button above it allowing them to print that final confirmation message
- Discount Code Limit Counting: Each discount code has a limit for how many times it can be used. Here you can set if that limit will be counted per event or for all events together
- Google Maps API Key: Enter your Google Maps API key if you are choosing to display a link to Google maps for your event locations. To get your Google Map API key go to: http://code.google.com/apis/maps/signup.html
Available fields in Display Settings
- Security Images On: You can add security images to your Free Registrations and your Waiting List forms.
- Terms & Conditions: Change this to YES if you would like to require users to agree to terms and conditions
- Date Format: Select how the date should be formatted
- Show Date with Event Name: Select Yes/No to show the event date with the event title through the registration process
- Show Time zones: Select if you want to display the event timezone along with the event time. If enabled, it will apply in the list view, calendar view, registration forms and emails
- Default Time zone: Select the timezone to be used for your events. Each event has the option of selecting a timezone specific to the event. When no timezone is selected in the event, this default timezone will be used
- Show Fee Breakdown on Confirmation Page: Select if you want to show a detailed fee breakdown on the confirmation page. If you select No, only the total cost will display
- Hide Full Events Select whether or not to hide full events from both the list and calendar views
Available fields in Group Registration Settings
- Send Confirmation Email to All Group Members: Select whether or not you want a confirmation email sent to each member of a group registration. If you choose NO, only the group billing contact will receive the email
- Show Group Size Warning: In Detailed Group Registrations, enabling this feature will add a warning box under the navigation buttons on group member pages, letting the user know how many spaces are available for the event.
- Apply Discount Code: Select if you want discount codes applied to each member or once for the entire group in a group registration.
- Apply Late Fee: Select if you want late fee amounts applied to each member or once for the entire group in a group registration.
- Apply Member Discount: Select if you want member discounts applied to each member or once for the entire group in a group registration
- Apply Early Bird Discount: Select if you want early bird discounts applied to each member or once for the entire group in a group registration
- Apply Partial Payment Amounts: Select if you want partial payment amounts applied to each member or once for the entire group in a group registration
Available fields in Default members discount
- Member Discount Type: Setup the default member discount type for your registered users, select the type: Dollar Amount or Percentage. This will be used for all events unless an event specifies custom member discount options
- Member Discount Amount: Enter the amount of discount you want to offer to users from the selected user group. Enter numbers only - no currency or % symbols
Event Listing
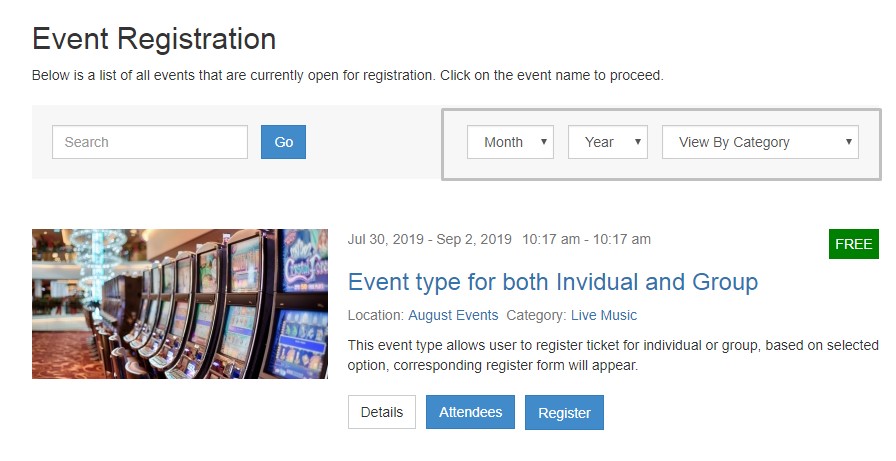
Event listing Frontend
In This section allow you to configure the event listing page layout, to show hide the filter, events dates, title, location and misc information etc.
Event listing configurations - View full image
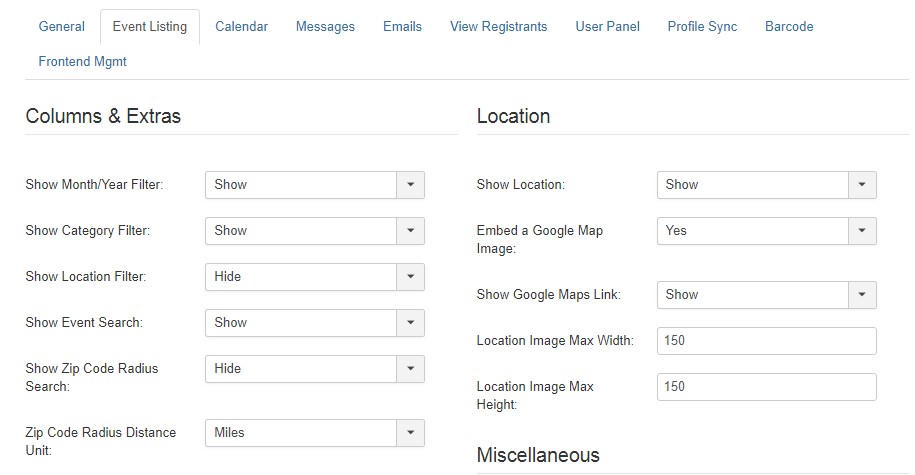
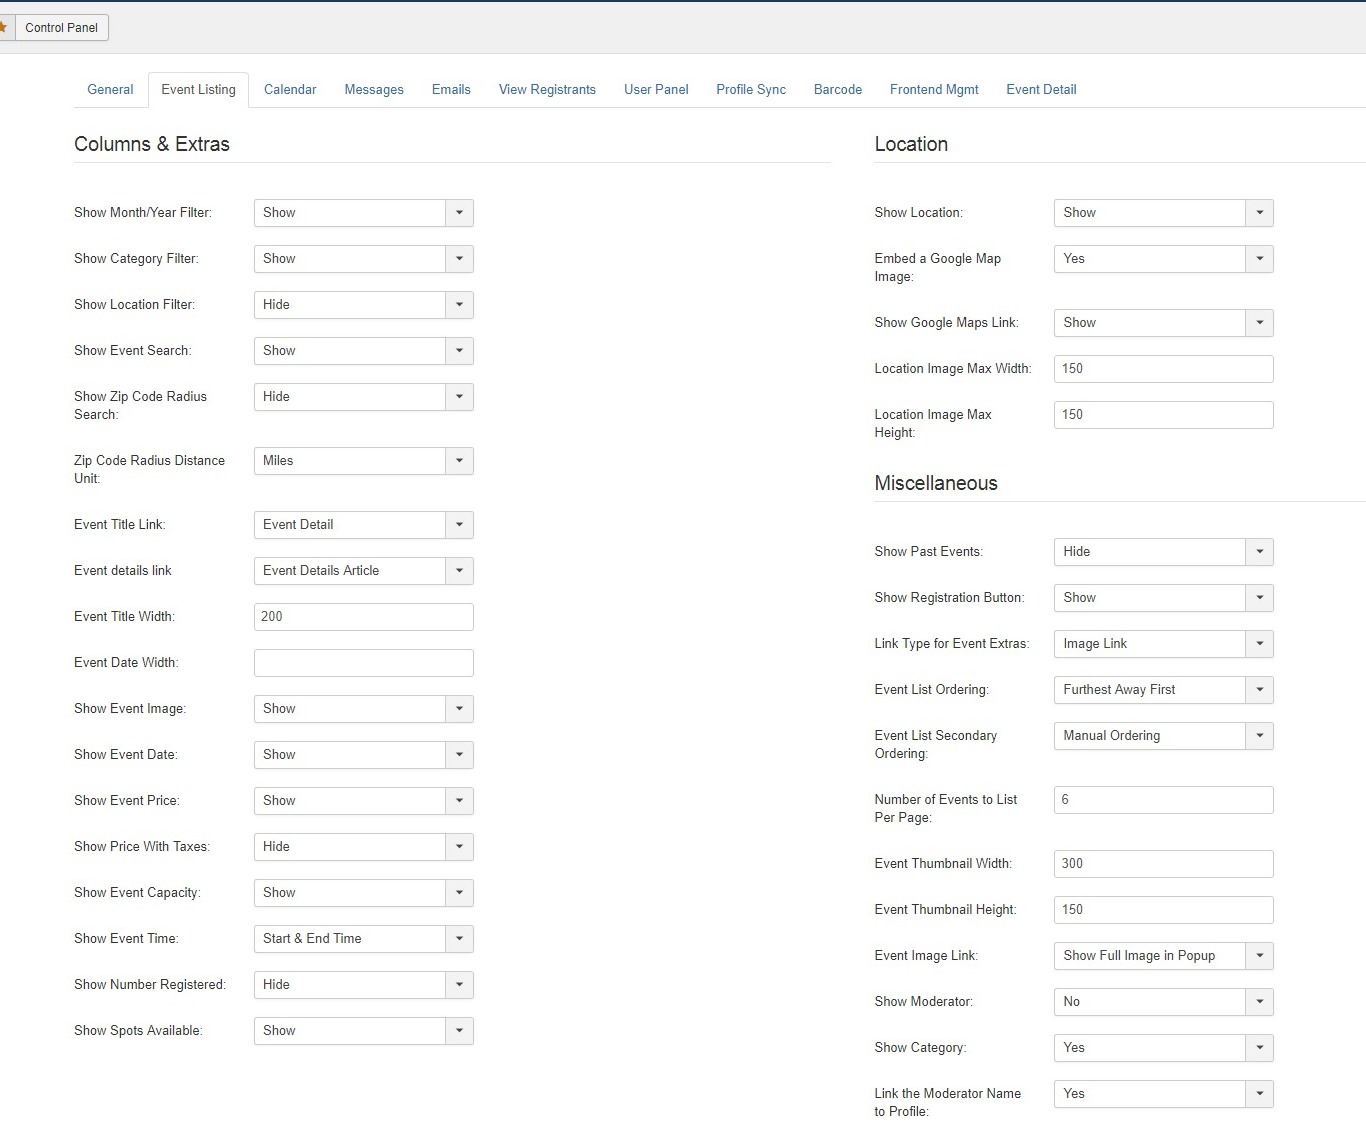
Available fields in Columns and Extras Settings
- Show Month/Year Filter:Select whether or not you want the Month/Year filter to show above the list of events
- Show Category Filter: Select whether or not you want the category filter to show above the list of events.
- Show Location Filter: Select whether or not you want to show the location filter above the list of events, allowing the user to filter events shown to a specified location.
- Show Event Search: Select whether or not you want the event search box to show above the list of events
- Show Zip Code Radius Search:Select whether or not to display a zip code radius search feature, which allows users to enter a zip code and then get results within X miles or kilometers from the zip code they enter
- Zip Code Radius Distance Unit: Select whether the zip code radius distance is to be measured and displayed in miles or kilometers
- Event Title Link: For the main listing of your events, select if you want the event title link to send users straight to registration or to the JEvents detail page
- Event Detail Link: Set link of the event detail page
- Event Title Width: Control the width of the event title column on the frontend listing of events
- Event Date Width: Control the width of the frontend DATE column on the listing of events
- Show Event Image: Select if you want to show the event thumbnail image or not.
- Show Event Date: Show or hide the date column on the event list.
- Show Event Price: Show or hide the price column on the event list
- Show Price With Taxes: Select if you want the price to be displayed in the event listing with or without taxes. Select YES to show the price in two lines, price without tax and then price without tax. This is required in some countries. Select NO to just show the base price of the event
- Show Event Capacity: Show or Hide the event capacity column on the event list
- Show Event Time: Select if you want to show the event time on the list of events. If not, select Hide. If you want to show it, select if you want to show just the Start Time, or both the Start and Ending Times
- Show Number Registered: Show or Hide the current number of registrants on the event list
- Show Spots Available:Select whether or not you want to display the number of available spots remaining for the event within the event listing view
Available fields in Location settings
- Show Location: Select if you want to show the event location on the list of events
- Embed a Google Map Image: If your location has an address, a google map will automatically be embedded in the location popup window unless you choose to turn it off here
- Show Google Maps Link: Select if you want to show the link to Google Maps for your event locations. If you are using this, be sure to enter your Google key in the next line
- Location Image Max Width: Set a maximum width in pixels of your location image
- Location Image Max HeightSet a maximum height in pixels of your location image
Available fields in Miscellaneous
- Show Past Events: Select to Hide or Show past events. If you SHOW past events, they will still show on the list of events IF they are marked as published in Event Management. Registration will still be closed for the event
- Show Registration Button: Select to Hide or Show past events. If you SHOW past events, they will still show on the list of events IF they are marked as published in Event Management. Registration will still be closed for the event
- Link Type for Event Extras: Select if you want to use an image or text link for the extra items on the listing of events including Details, Attendees, and Register
- Event List Ordering: elect the desired ordering of events on your site.
- Event List Secondary Ordering: Events will be listed based on the primary ordering set above, but when the primary ordering is CATEGORY, then this secondary ordering will apply to establish the ordering of events within the category. This setting will not affect any other ordering option.
- Number of Events to List Per Page: Input how many events to list per page on the frontend listing of events.
- Event Thumbnail Width: Specify the forced width of the event thumbnails. Regardless of the image size, it will be displayed at this width.
- Event Thumbnail Height: Specify the forced height of the event thumbnails. Regardless of the image size, it will be displayed at this height
- Event Image Link: When using event images, select where the image will link to. It can link to registration or to a lightbox popup showing the full-size image
- Show Moderator: Select if you want to show the event moderator on the list of events. It can be displayed as the moderator's full name, their username, or both.
- Show Category: Select if you want to show category buttons below the calendar. It will give a color-coded set of buttons for each category. Clicking them will show events in the calendar only for the selected category.
- Link the Moderator Name to Profile: Select if you want the moderator name to be a link to their user profile page.
Calender
This section help you to configure the calender setup for events, You can control all the settings via this tab.
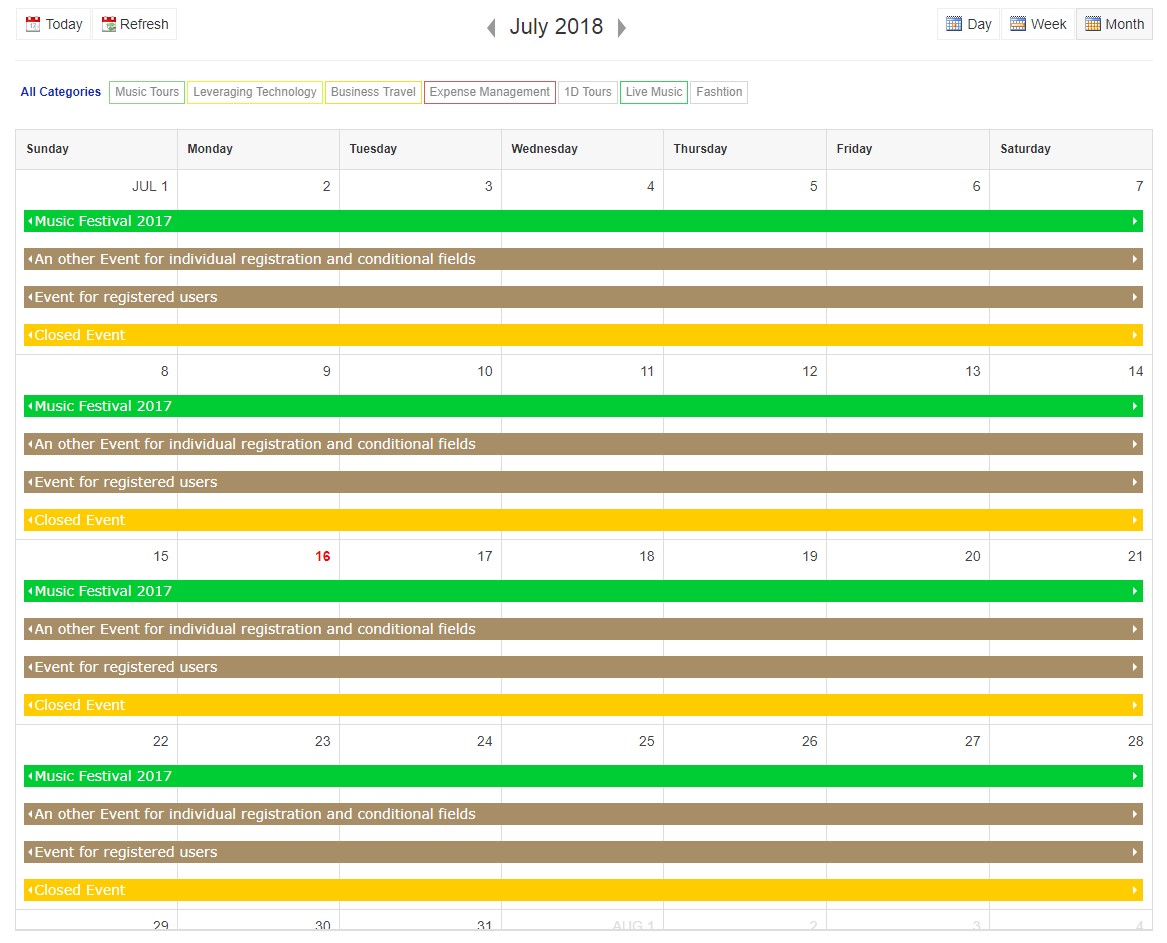
Event Calender configurations
In the calendar configuration you can set the display option of calendar as well calender item popup details
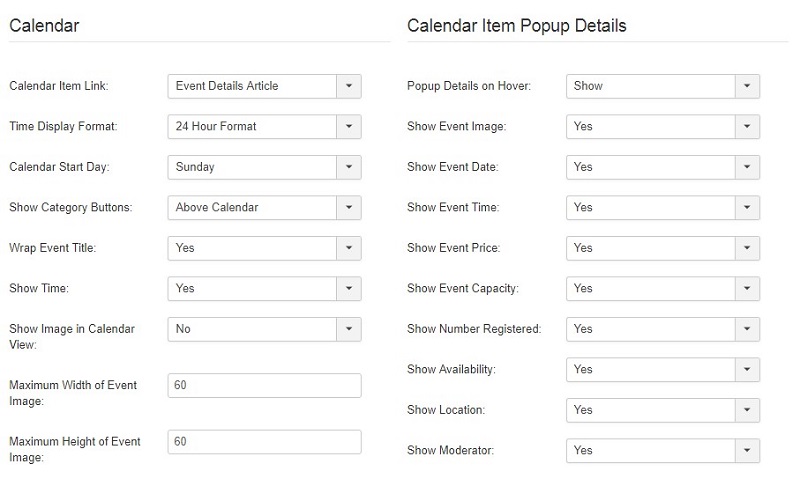
Calender configurations
Available fields in calender configuration
- Calendar Item Link: When using the frontend calendar view, select if you want the calendar item to link to the event's selected Details Article or straight to Registration
- Time Display Format: Select the time format to display your event time in. Use 12 Hour to show as 9:00 PM or use 24 Hour to show as 21:00
- Calendar Start Day: Select if you want the weeks of the calendar to start on Sunday or Monday
- Show Category Buttons: Select if you want to show category buttons below the calendar. It will give a color-coded set of buttons for each category. Clicking them will show events in the calendar only for the selected category
- Wrap Event Title: Select if you want the event title to wrap onto multiple lines as needed. If NO, then the title will get cut off if it is longer than the space available.
- Show Time: Select if you want to show the event time in the calendar view. If Yes, it will follow the time format set in the event
- Show Image in Calendar View: Select whether or not to include the event image inside of the calendar grid view
- Maximum Width of Event Image: Set the maximum width of the event image when displayed inside of the calendar
- Maximum Height of Event Image:Set the maximum height of the event image when displayed inside of the calenda
Available fields in calender item popup configuration
- Popup Details on Hover: Select to show or hide the popup details when the mouse hovers over a calendar item
- Show Event Image: Select whether or not to include the event image inside of the calendar details popup box
- Show Event Date: Select whether or not to include the event date inside of the calendar details popup box
- Show Event Time: Select whether or not to include the event time inside of the calendar details popup box
- Show Event Price: Select whether or not to include the event base price inside of the calendar details popup box
- Show Event Capacity: Select whether or not to include the event capacity inside of the calendar details popup box
- Show Number Registered: Select whether or not to include the current number of registrants inside of the calendar details popup box
- Show Availability: Select whether or not to include the current space/ticket availability inside of the calendar details popup box
- Show Location: Select whether or not to include the event location inside of the calendar details popup box
- Show Moderator:Select whether or not to include the event moderator inside of the calendar details popup box
Message
This section help you to configure the message for user that will come after the event registration.This section allow you to add custom message for users with redirect option.

Message Confirmation
In this section you can configure the message that will appear after the registration for an event. You can customize the message using field tags
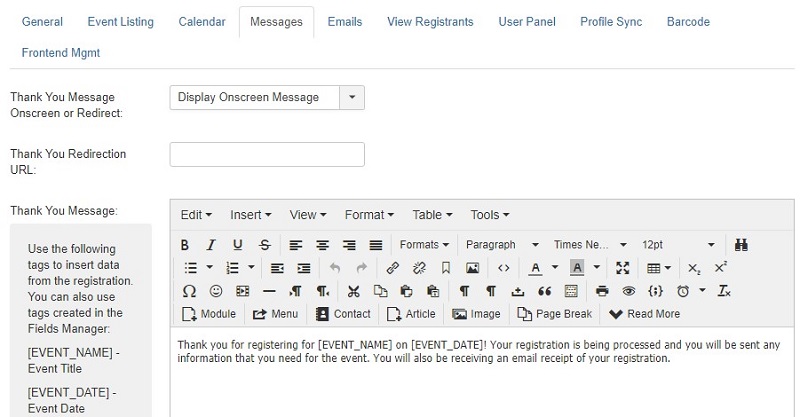
Message configurations
Available Message option to customize the messages
Thank you message
- Thank You Message Onscreen or Redirect: Choose if you want to display a customized onscreen message after someone registers for an event or instead to redirect to another URL. The URL does not have to be part of your website
- Thank You Redirection URL: Enter the full URL of where you want to redirect users after completing a registration
- Thank You Message Thank You Message to display after successful registration
Pay later Thank you message
- Pay Later Thank You Message Onscreen or Redirect: Choose if you want to display a customized onscreen message after someone registers for an event using the Pay Later option or instead to redirect to another URL. The URL does not have to be part of your website
- Pay Later Thank You Redirection URL: Enter the full URL of where you want to redirect users after completing a registration with the Pay Later option
- Pay Later Thank You Message: Enter the Thank You Message to be displayed onscreen when a Pay Later option was chosen for payment
- Message to display for Full Event: This message will be displayed above the Waiting List form for a user that wants to register for an event that is already full to capacity
- Cut-Off Date Message: This is the message to display to users when they attempt to register for an event that is past the cut off date for registration.
- Message to display after successful Waiting List addition: This message will display on the screen AFTER the user fills out the Waiting List form." data-original-title="Message to display after successful Waiting List addition
- Message to display the terms and conditions: This message will be displayed in a popup window when the user clicks on the Terms & Conditions link
- Private Event Message: This is the message that will display on the screen to a public user if the event has been set up as private. This field will accept HTML
- Prerequisite Event Message: his is the message to be displayed on the screen when a user tries to register for an event without having first registered for all of the prerequisite events. You can use the tag [PREREQ_EVENTS] to dynamically include a list of any prerequisite events that apply. You can also use the tag [PREREQ_CATEGORY] to display a list of prerequisite categories for this event.
- Overlapping Event Message: This is the message to display onscreen when a user tries to register for an event that overlaps the date/time of an event they are already registered for. This will only display if the Overlapping Event Check is set to YES in the general configuration.
Emails
This section helps you to configure the email messages that has been sent to user in form of Thanks email, waiting email, new user registration notification, and status change notifications.
Email configurations - View full image
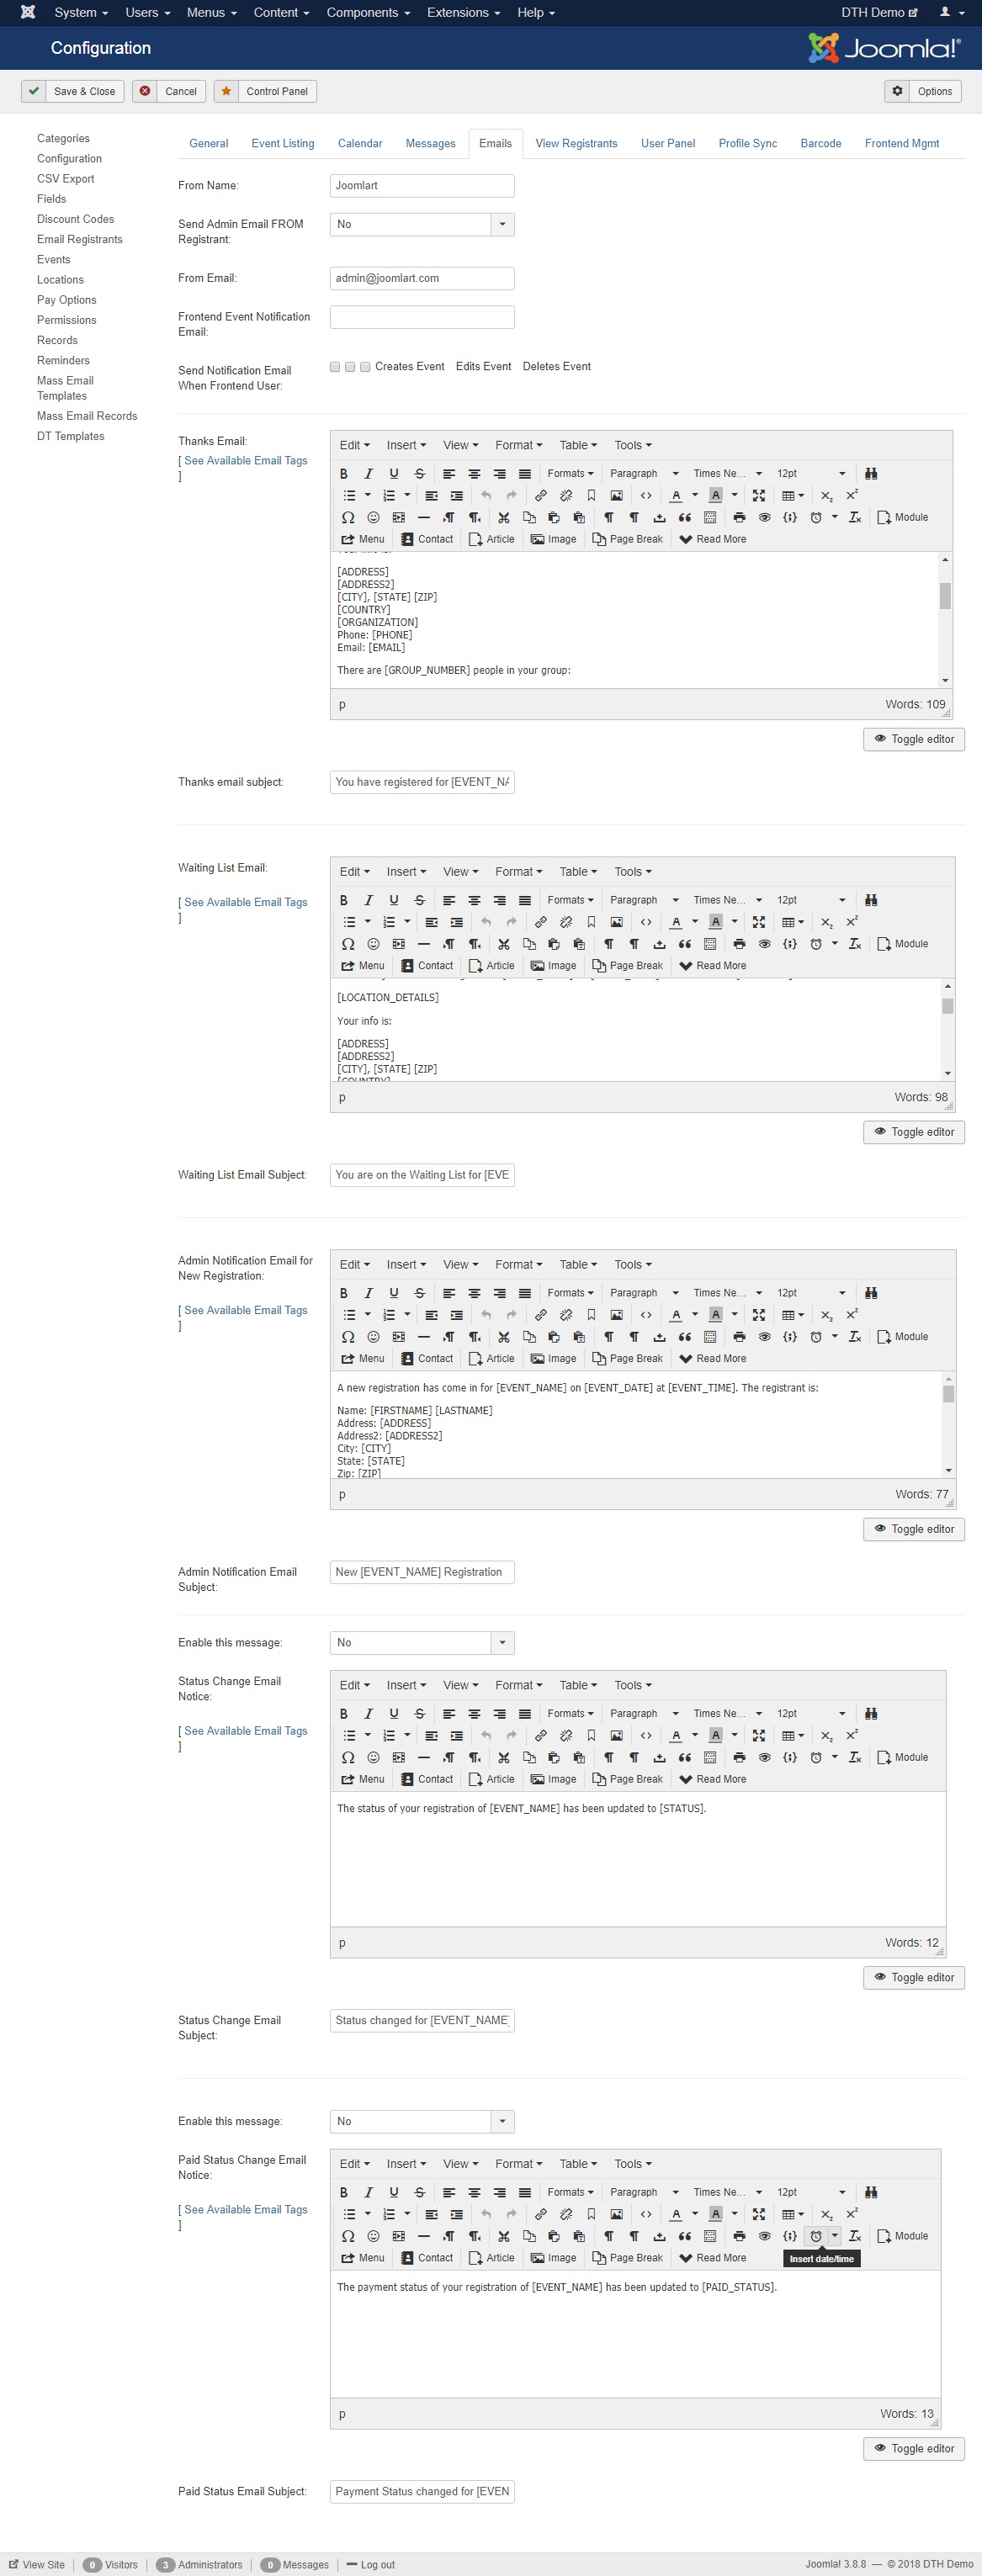
Available fields in the Emails
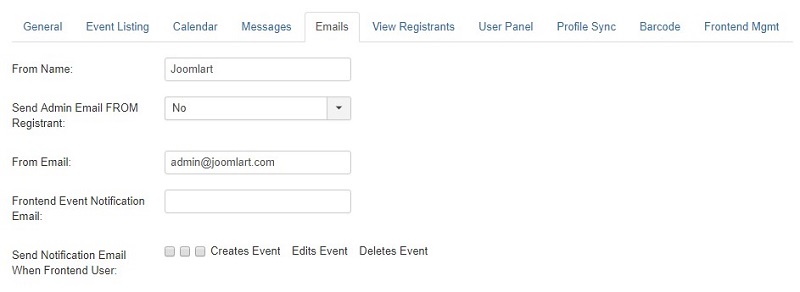
- From Name: Enter the name that emails will show as FROM. If no name is provided, the name from the global Joomla mail config will be used.
- Send Admin Email FROM Registrant: Select YES if you want the Admin Notification Email to be sent as FROM the registrant's name and email address, or leave it set as NO so the email is sent from the default email settings from configuration.
- From Email: Enter the email address that emails will show as FROM. If no email is provided, the email address from the global Joomla mail config will be used
- Frontend Event Notification Email: Enter the email address(es) to be notified when frontend users create, edit or delete events.
- Send Notification Email When Frontend User: Select any of the given options to enable the sending of an email notification to provided email address whenever a frontend user creates, edits or deletes an event.
- Thanks Email: Thank You Email to send after successful registration. You can use various tags to insert data from the registration
- Thanks email subject: Email Subject to send after successful registration. Use [EVENT_NAME] to insert the event title.
- Waiting List Email: Create the confirmation email that is sent to a user after successfully adding themself to the waiting list for an event
- Waiting List Email Subject: Create the subject for the waiting list confirmation email
- Admin Notification Email for New Registration: Admin Email notification
- Admin Notification Email Subject: Add Subject for the admin email notification
- Enable this message: Enable or disable option for status change email notification
- Status Change Email Notice: This is the email that will be sent to registrants to notify them of any change in status to their record. For example, admin changes the record from "Pending" to "Active
- Status Change Email Subject: This is the subject for the status change email. You can use the email tags: [EVENT_NAME], [EVENT_DATE], [STATUS], [PAID_STATUS]
- Enable this message: Enable or disable option for paid status change email
- Paid Status Change Email Notice: This is the email that will be sent to registrants to notify them of any change to their payment status. For example, admin changes the record from "Not Paid" to "Paid".
- Paid Status Email Subject: This is the subject for the paid status change email. You can use the email tags: [EVENT_NAME], [EVENT_DATE], [STATUS], [PAID_STATUS]
View Registrants
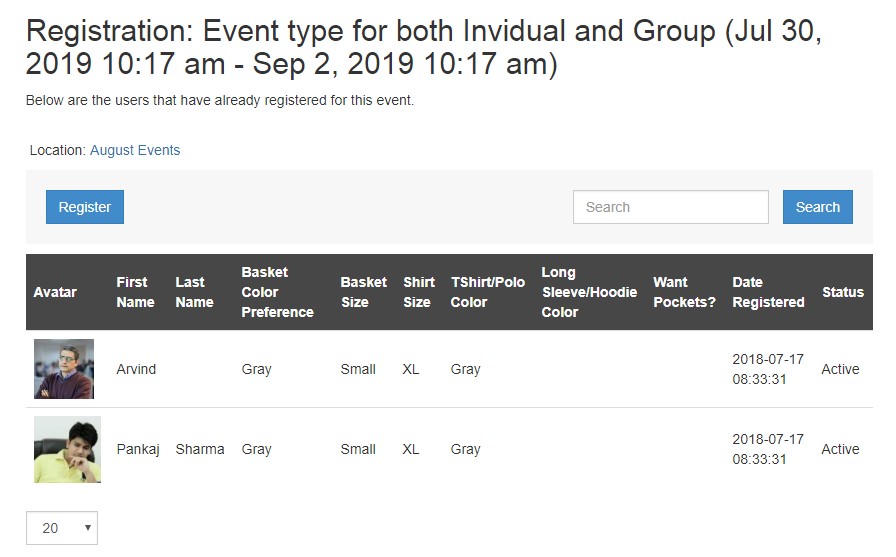
Registrant frontend
This section help you to configure Regsitrant page view, Allow you to setup the message, name, avatar and group settings.
Registrant configurations
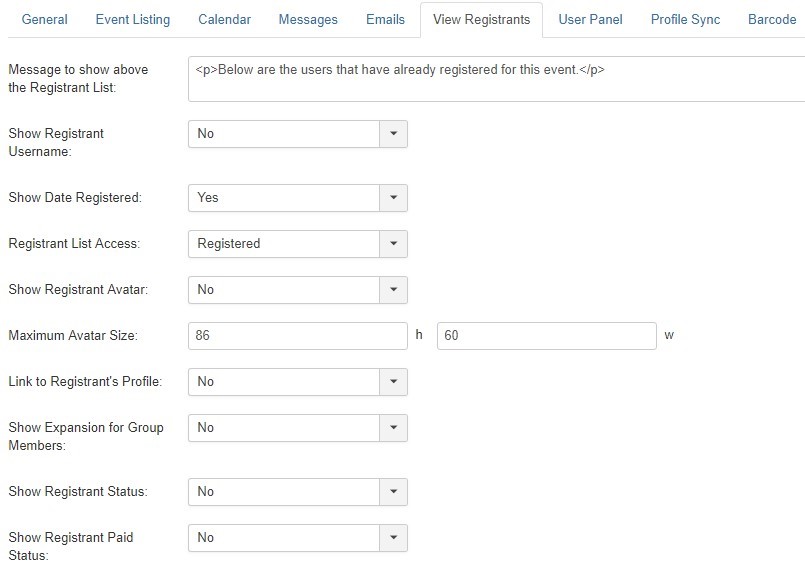
Available fields in View Registrants
- Message to show above the Registrant List: Enter a message to display above all registrant list pages. HTML is supported in this field.
- Show Registrant Username: Select if you want to display the registrant username or not
- Show Date Registered: Select if you want to display the date that the registrant record was created
- Registrant List Access: Select the access level for the list of registrants. If set to Public, all site users will be able to view this information. If set to Registered, only logged in users will have access to this list. Set it to Special to give only admin user level access.
- Show Registrant Avatar: Select if you want to display the registrant user avatar from their profile
- Maximum Avatar Size: Enter a maximum height and width for the registrant user avatar
- Link to Registrant's Profile: Select if you want to link the registrant record to their Community Builder or JomSocial profile.
- Show Expansion for Group Members: Select if you want to show a +/- icon to the left of the registrant list which will expand to show members of a group registration. Clicking it again will close the expanded information
- Show Registrant Status: Select if you want to show the status of the registrant
- Show Registrant Paid Status: Select if you want to show the paid status of the registrant
User Panel
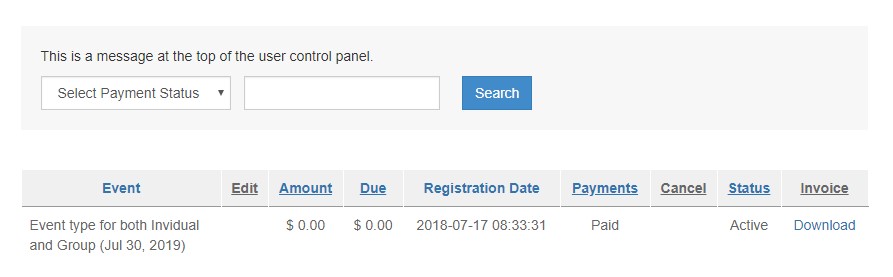
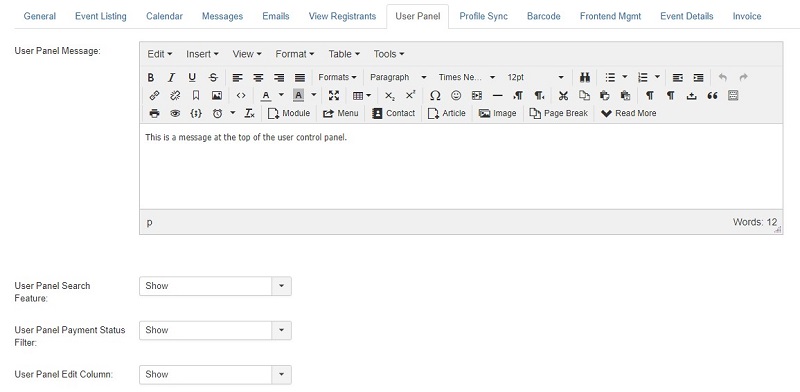
User panel frontend
This section helps you to control the user panel for the amount, search and user panel emails
User configurations - View full image
Available fields in user panel
- User Panel Message:
- User Panel Search Feature:
- User Panel Payment Status Filter:
- User Panel Edit Column:
- User Panel Amount Column:
- User Panel Amount Due Column:
- User Panel Payments Column:
- User Panel Cancel Column:
- User Panel Status Column:
- User Panel First Name Column:
- User Panel Last Name Column:
- User Panel Emails
Profile Sync
Profile view
If you are using Community Builder or JomSocial integration, please use the following field mapping options to select which profile fields should connect to the form fields of DT Register. When you assign the fields, it will allow the event registration form fields to auto-populate with the selected data from a logged in user's profile.
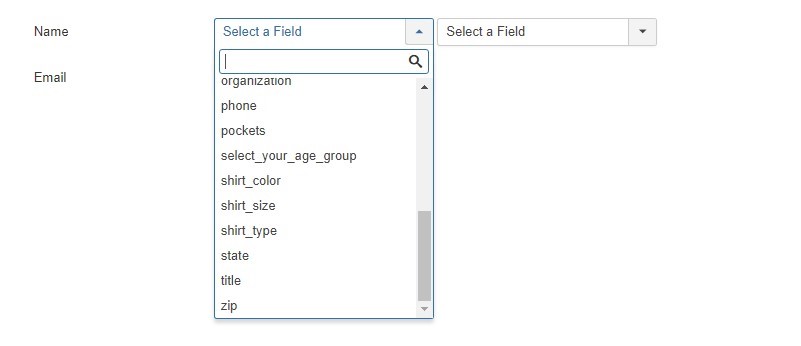
Profile view
Barcode
This section allow you to enable the barcode option with barcode display settings. The barcode will be sent to user after even regsiration.
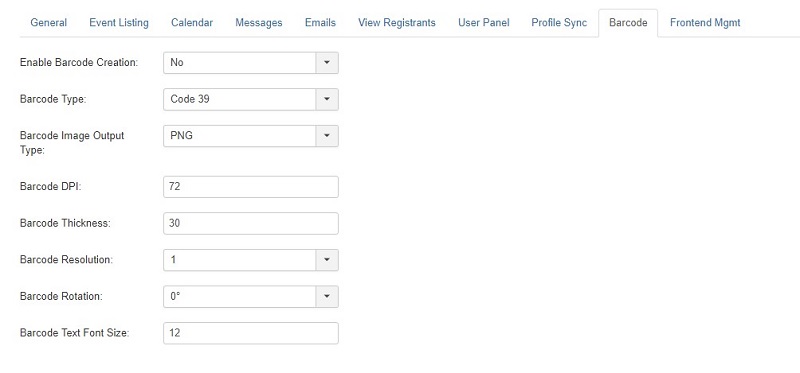
Barcode configurations
Available fields in barcode
- Enable Barcode Creation: Select if you want to generate barcodes for each record. The barcode will be unique and based on the confirmation number of each registration record. It can be included in user emails with the [BARCODE] tag. The barcode image will be generated and saved in /images/dtregister/barcode so make sure that directory exists and is writable. When a record is deleted, the associated barcode image will also be deleted
- Barcode Type: Select the type of barcode you wish to generate
- Barcode Image Output Type: Select the type of image file you wish to generate for your barcode. Default is PNG
- Barcode DPI: Set the DPI of your barcode image. Default is 72.
- Barcode Thickness: Select the thickness of the barcode image generation. This affects how long the individual barcode lines are
- Barcode Resolution: Select the resolution of the barcode image.This is like a zoom setting, with 1 being the smallest and 3 being the largest display.
- Barcode Rotation: Select the rotation of the barcode display. Default is 0. Selecting 90 or 270 will display the barcode vertically
- Barcode Text Font Size: Select the font size of the text that shows below the barcode
Frontend Management
This section allow you to configure records ,events and discount code settings.
Frontend Management - View full image
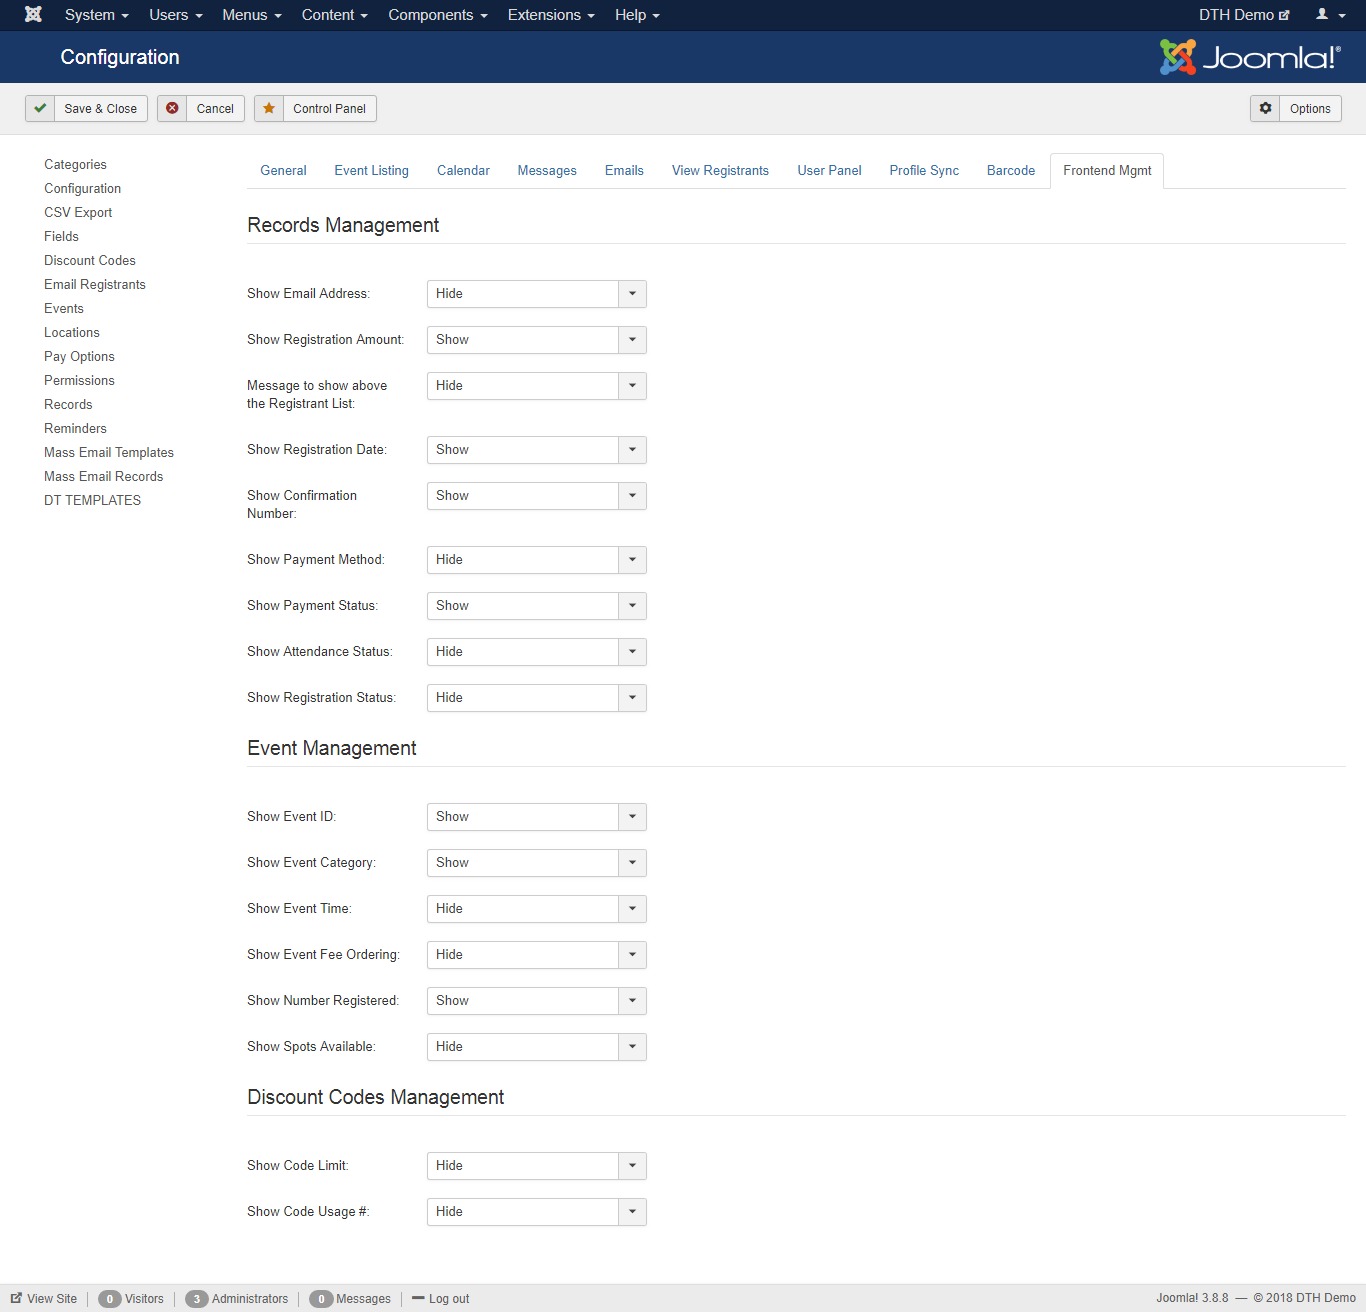
Available Fields in Frontend Management
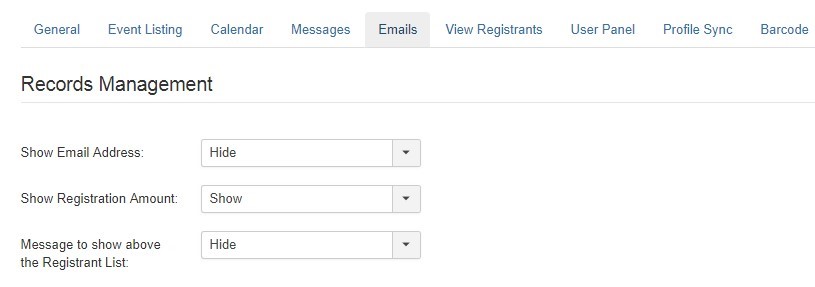
Records Management
- Show email address: Select whether or not the frontend records management list will show email addresses.
- Show Registration Amount: Select whether or not the frontend records management list will show registration amounts
- Message to show above the Registrant List: Select whether or not the frontend records management list will show amounts due
- Show Registration Date: Select whether or not the frontend records management list will show registration dates.
- Show Confirmation Number: Select whether or not the frontend records management list will show confirmation numbers
- Show Payment Method: Select whether or not the frontend records management list will show payment methods.
- Show Payment Status: Select whether or not the frontend records management list will show payment status.
- Show Attendance Status: Select whether or not the frontend records management list will show attendance status
- Show Registration Status Select whether or not the frontend records management list will show registration status.
Event Management
- Show Event ID: Select whether or not the frontend event management list will show event IDs
- Show Event Category: Select whether or not the frontend event management list will show event categories
- Show Event Time: Select whether or not the frontend event management list will show event times
- Show Event Fee Ordering: Select whether or not the frontend event management list will show the event fee ordering link
- Show Number Registered: Select whether or not the frontend event management list will show the number of registrants
- Show Spots Available: Select whether or not the frontend event management list will show the number of spots available for events
Discount Codes Management
- Show Code Limit: Select whether or not the frontend discount code management list will show code limits.
- Show Code Usage #: Select whether or not the frontend discount code management list will show the number of time a discount code has been used.
Event details
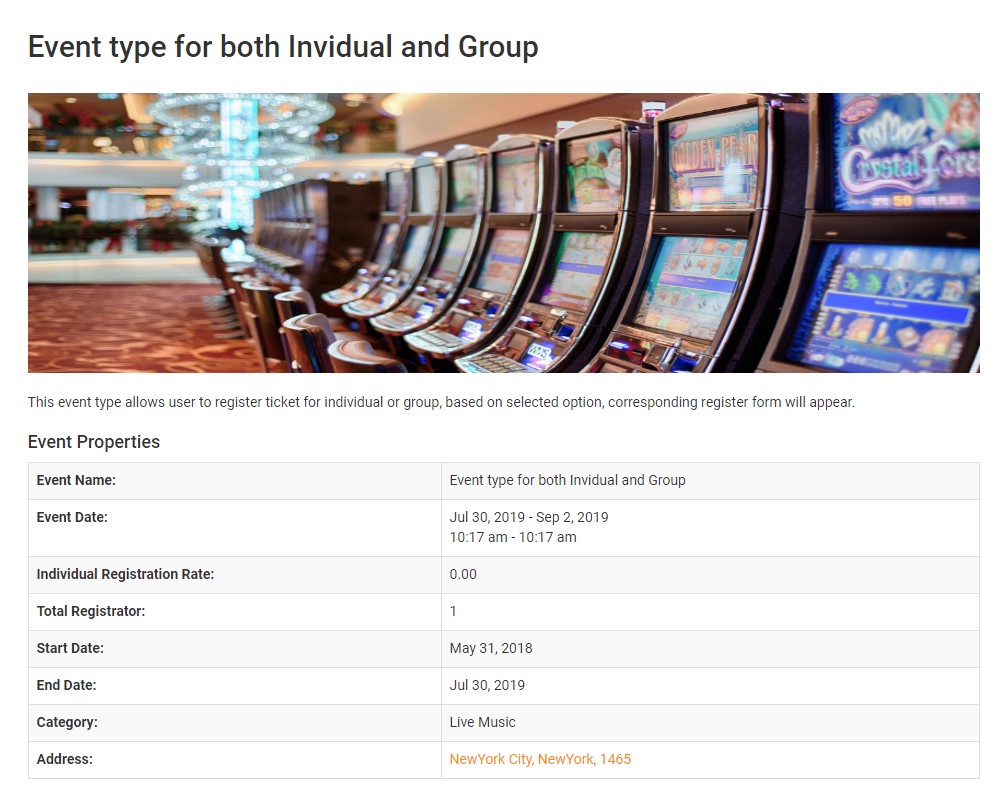
Event details page/p>
This section allow you to configure display settings for event details page.
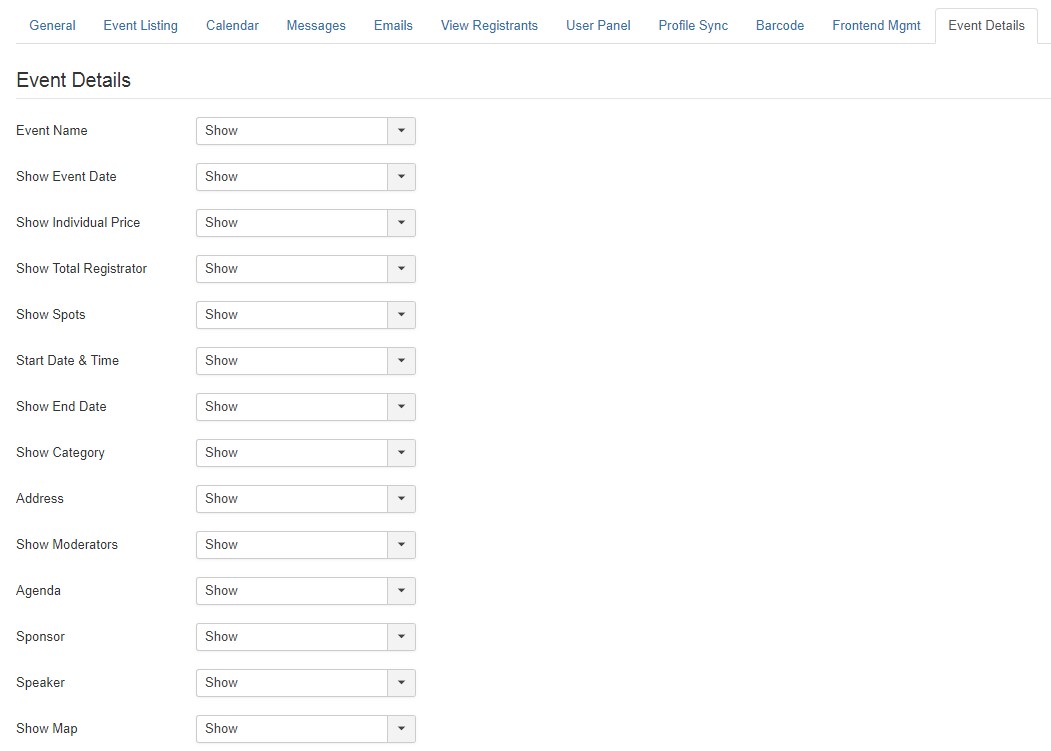
Event details configurations - View full image
Available fields in event details
- Show Event Name: Enable this option to show event name
- Show Event Date: Configure to show event time or not
- Show Individual Price: Show Individual Price
- Show Total registrator : Show or hide total registrator
- Show Spots: Show or hide spots
- Start Date & Time: Show start date & time
- Show End Date: Show end date on event page
- Show Category: show or hide category
- Address: Show to hide address
- Show Moderators: Show or hide Moderator
- Agenda: Show agenda
- Sponsor: Show sponsor
- Speaker: Show speakers
- Show Map: show or hide map
Invoice Configurations
In this section you can customize the invoice emails and invoice layout, The invoice will be sent to attendees after successful registration
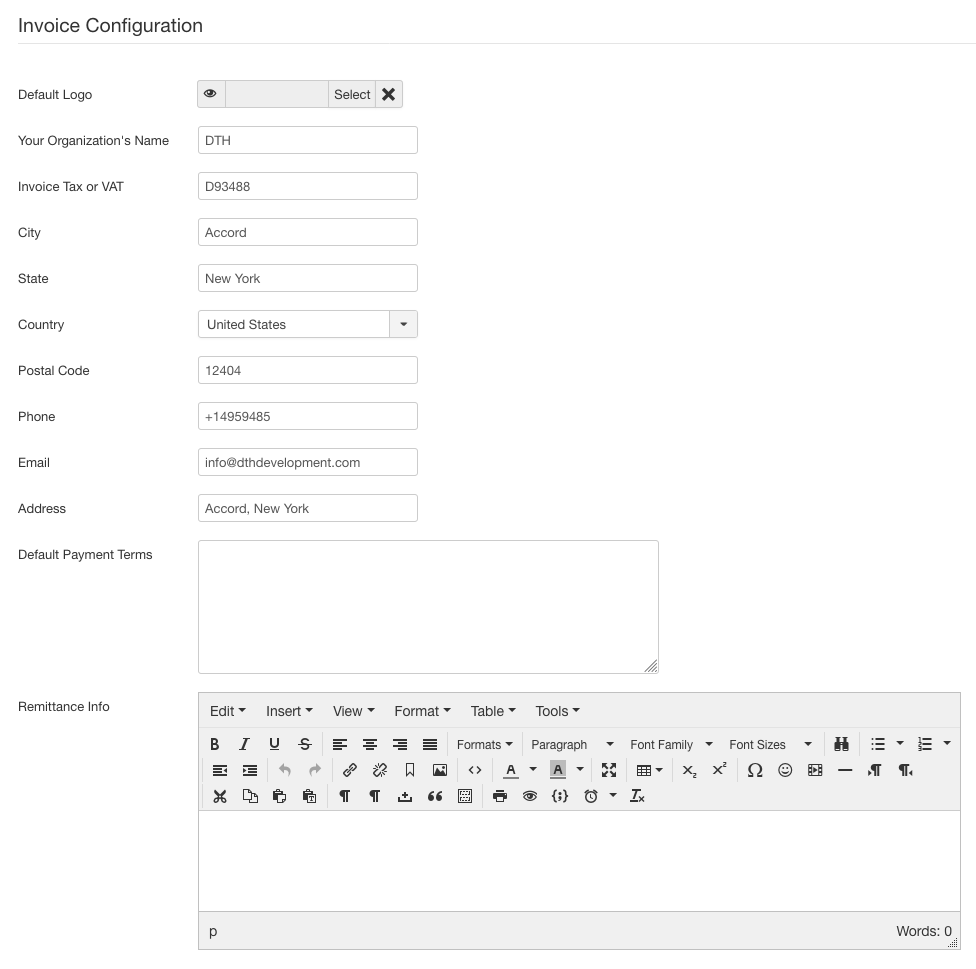
Invoice Configurations
Available Fields in the invoice
- Default Logo: Enter the default logo that will be used on all invoices. This can be overridden at the time of generating the invoice.
- Remittance Info: Info to be shown in the remittance section of the invoice
- Default Payment Terms: Add payment terms
- Your Organization's Name: Add Organization's Name
- Email Invoice: Enable /disable Email invoice
- From Name: Enter the name as emails will display as FROM. If nothing is entered the name from the Global Config in Joomla will be used
- From Email Address: nter the email address that recipient will see as FROM. If nothing is entered the email address from the Global Config in Joomla will be used.
- Email Subject: Add email subject
- Email Message for Sending Invoice: Add email message
Strong>Invoice email template
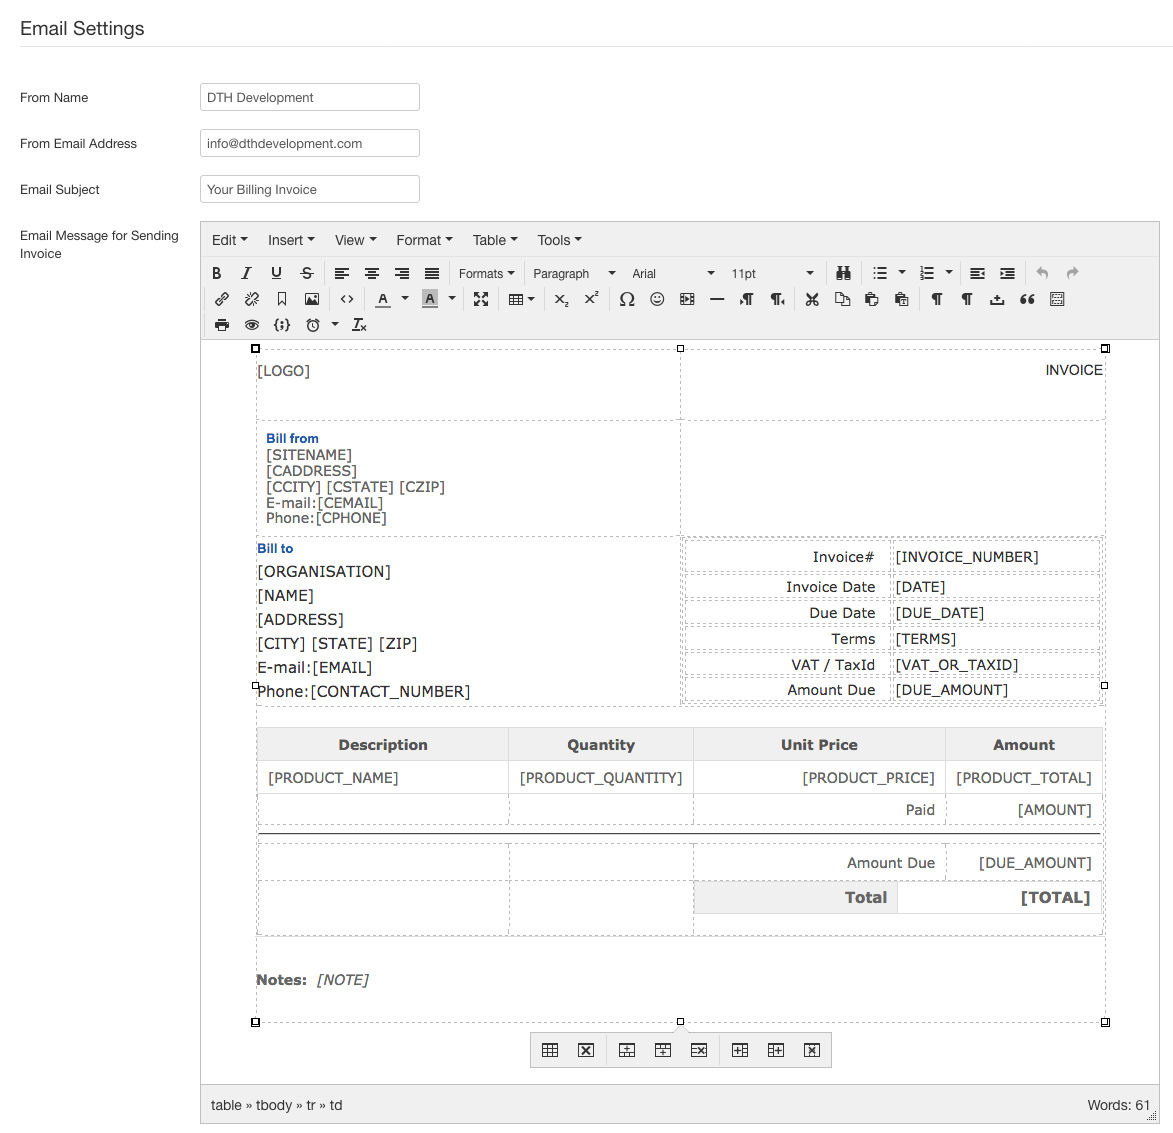
Invoice Email Configurations